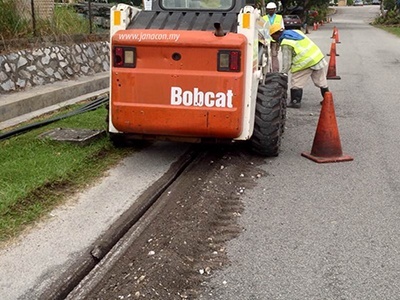
 The disruption often caused when installing new fiber is never popular. Local residents dislike their roads and sidewalks being dug up while local governments have to deal with increased congestion, particularly if projects overrun their anticipated schedules.
There are big advantages to installing microduct underground since it can be laid relatively quickly and does not require specialist fiber crews.
The cost compared to installing larger sub ducts or direct bury (DB) fiber is lower both in terms of material and time. Direct bury products are generally of heavier construction with thicker sheaths and so are able to withstand higher impact and crush loads. Depending on their make-up, they can be used in excavated trenches, mole-plowed routes or inserted into slot cuts in the surface of roadways.
Here are some tips to make the direct bury microduct for fiber installation smoother, quicker, and more satisfactory for all involved.
Do's
- Obtain proper right-of-way permits.
- Identify existing underground utilities, such as buried cables and pipes.
- Investigate the soil condition, in order to determine the installation depth, whether duct should be used, the type of fiber cable that should be used and plowing equipment needed.
- Keep the trenches as straight as possible.
- Always cut the microduct with a manufacturer-approved tube cutter.
- Before installation, make sure that the sealing plug is in place at the ends of the microduct to prevent dirt and water entering the duct.
- Allow plenty of excess pull-cord to exit the duct (3ft or more) - this will be needed when it comes to installing fiber.
- Make sure the draw cord is trapped in place by the sealing plug.
- Do not exceed the maximum pulling force.
- Bury microduct deep enough in the ground to prevent it being damaged by other utilities, rodents, tree roots and freezing ground water.
- Ensure the bottom of the trench is level so that the microduct lies flat; this makes installing the fiber in the duct easier.
- Backfill the trench before installing the microduct to prevent damage by stones.
- Fiber cable warning labels should be buried directly above the cable.
- Backfill above and to the side of the microduct, to prevent damage by stones when you compact the backfill above the microduct.
- When installing an access box, support the microduct to maintain its alignment where it passes through the access box.
 Don'ts
- Install with inexperienced personnel.
- Dig where an area is unmapped or unknown.
- Create sharp bends in the duct.
- Leave stones or rocks in the trench.
- Share the space with leaking, unmapped sewage pipes.
- Leave jagged edges on the microduct.
- Do not exceed the maximum pulling tension rating.
- Do not twist the cable - twisting the cable can stress the fibers.
- Do not exceed fiber optic cable minimum bending radius.
- Do not use heavy tools to position the ducts.
- Do not allow the duct to undulate in the trench - apply tension if necessary to straighten routes.
One important aspect of direct bury microduct is to inspect or test the route before reinstating the ground surface. This is much more straightforward if the duct has a pull-cord pre-installed. With an installer at each end, the pull-cord can be tested for freedom of movement. Crews may opt to have a small reel of pushable fiber cable at hand if no pull-cord exists. This can be installed temporarily to check the pathway is clear and unhindered.
Validating the route before the cable is installed might add a few extra minutes to the project but can potentially save days of fault finding exercise should the worst happen. Diagnosing or fixing a damaged direct bury microduct will often cost most that it’s worth.
Microducts are a key part of many fiber deployments across the globe. However, as with any type of installation, things can go wrong, adding to time and cost. Therefore, following best practice and using high quality equipment is critical to ensuring successful deployments, time after time.


